Pages - Menu

Tuesday, December 23, 2014

Star Pastry Snack

Looking for an easy last minutes snack for a party? Or a simple Christmas treats idea? I have a good recipe for you. Star pastry snack. It is cute, simple, easy to make, and delicious. As long as you have ready to use puff pastry, egg, and sugar, you can make it anytime you want.


I got this idea about few days before my son's Christmas party at school. It's very common in here that the children will have a Christmas dinner together at school to celebrate Christmas every year. Basically, every children will gather together and have dinner together at school along with the teacher and their classmate. They get to use a nice clothing, such as a dress or suit, and sit around the nicely decorated table. There will be a candles and cute set of cutlery (of course it's plastic) as well. The party itself is a potluck. Each (parents of the) children have to bring one kind of food (preferable finger food). For a smaller children, they do not have dinner but they will have Christmas breakfast.

My son is still 2.5 years old and he's still in peuterspeelzaal (playgroup). He was going to have a Christmas breakfast at his school and I could bring some snack for the children. Hmm... Making a snack for 2-4 y.o children is not as easy as making snack for 8-9 y.o children. They're more picky and can not accept all kind of food. I suddenly remember couple months ago when I made pastry snack using some leftover puff pastry from making custard cream horns. There were a lot of small slices and cut puff pastry that could not be used to make custard horns. Instead of threw them away into garbage bin, I brushed them all with egg wash, sprinkle some crystal sugar on the top, and baked them by following the instruction as the usual. Based on the same method, I think I could make a good snack for his Christmas party at school. Beside, I know my son likes it.


I made about 30 stars, put them in a plastic bag and wrap it nicely complete with a ribbon. It could be a good idea for Christmas gift as well. Just stick a small Christmas card on it, and it's ready to cheers up someone else's day. Merry Christmas everybody ^^

Ingredients : (for making 20 stars)

  • 5 sheets ready to use puff pastry (I'm using 20x20 cm ready to use puff pastry)
  • 1 egg, beaten
  • about 150 grams white granulated sugar 
Preparation :
  1. Thaw the puff pastry for about 10 minutes to make it easier to cut
  2. Meanwhile, preheat oven for 200 C (392 F)
  3. Prepare a baking sheet and line it up with baking paper. Set aside.
  4. Using a star cookie cutter, cut 1 sheet the puff pastry into 4 stars
  5. Place them on the prepared baking sheet.
  6. Repeat the process for all those puff pastry sheet. 
  7. Brush all the surface of the cut puff pastry with egg wash.
  8. Sprinkle granulated sugar on top generously.
  9. Put the pastry inside the preheated oven and bake it for 10-12 minutes or until they become golden brown. (Tip : take the pastry out of the oven once they become golden brown. the smaller the pastry cut, the shorter baking time that needed. It's really depend on the size of you pastry. But it is important to make sure that all the pastry have roughly the same size)
  10. Take the pastry out an let them cool completely. 
Tip : This snack is not meant to be stored for a long time. They could get soggy fast if it's not stored properly inside airtight container or not be eaten as soon as possible. If it's happening, put the pastry on the baking sheet and pop it into preheated 180 C oven for about 10 minutes. 


Thursday, December 18, 2014

Minion Birthday Cake

Last month, one of my daughter's friend was celebrating a birthday. And it just happened that she loves minions. I and her mother were just chatting around, and she asked me if maybe I could make a cute minion cake for her daughter's birthday party. I said yes without thinking! Few hours after the deal was made, it seems that my nervous thought was just awake and started to question my ability to make it. Will I be able to make it? How if I ruined the cake? That's mean that I would ruin a girl's birthday. I don't want that to happen. I almost never make a sculpted cake before. Well, I've made some before. But those cake were not  meant for selling purpose.

Calm down and be positive. It's  great challenge. This could be a good opportunity to start what I've been dreaming lately which is turn my hobby into a business. I've made a Pirate Boat Cake before. So, basically I know how to carve a cake. Beside, there's a lot of tutorial on the internet. How hard could it be. (Maybe if her mother knows this she would not order the cake from me. Thanks to her for putting such a big faith in me.^^ ) 

Well, I'm so glad I decided to go on and trust my skill. Voila!! I'm so happy with the result. 


I'm not saying it was perfect. But it's not bad for first attempt. I was not saying it was easy either. But well, I made it. :) This is the rough sketch of the cake that I wanted to make. Sitting minion with banana cupcake (But later I changed the cupcake with a small round cake with candle on top).


To realize that sketch, my first step, is to make all the details of the minion such as the Gru symbol, his overall button, the goggle, and the hair. I made it about 5 days before final assembly. Thanks to Ann Reardon from How to cook that for sharing a nice tutorial how to make minion cake. From her video I could learn how to make the big and nice silver goggle and all those tiny minion hairs. 

This minion cake is built from vanilla cake with vanilla butter cream. I've made 1 + 1/4 recipe of vanilla cake and bake it in a 15 cm round cake pan. I don't have 15 cm round cake pan, so I made a disposable cake pan by myself using a cardboard and aluminium foil. Well, I guess I miscalculated the size of the cake. I made the cake too much. The order were a cake for 15-20 people. But I think the amount of the cake that I baked could feed about 20-25 people. 


After the cake is done, the real work is begin. Cutting, stacking, sculpting, and shaping. 


After about 30 minutes, I managed to sculpt and shape my cake from the left picture into the right picture. Not bad, right?  The height of my minion cake to be is about 23 cm (the cake only) with 13 cm diameter.  


I coat the cake with vanilla butter cream twice. First, I coat it with a thin layer of butter cream and put it into the fridge until it firm up. This first layer will catch the crumb cake that fall from the cake so it wont get mixed with the the next layer of butter cream. After I finished with second coating, I put the cake again into the fridge before move to the next step.


Now, it's time to cover the cake with yellow fondant. It turned out, covering a big cake with fondant is not as easy as I imagined. I accidentally tear the fondant and had to re-roll it again. Too bad I didn't have fondant smoother as well. Making the hand was not easy either. I had to use small ramekins to prop the hand and prevent it being broken. After the yellow part is done, actually I had to make a pants for my minion. But I was a bit nervous so I decided to do it later and put the eye and black goggle strap. 


For the pants, I made a simple template using a paper and cut the fondant by following those template. It was quite hard to make it without a template. I always made it too big and had to redo it again and again. After the pants is done, its time to put all the small detail on my minion such as his tiny little feet, the pocket with Gru's symbol, the buttons for the pants, his hands. goggle, hairs, and finishing the detail for the small round cake. And the banana of course! ^^


By making this cake, I got a lot of leftover cake crumbs. I can eat it just like that. But it was too much and most of the crumbs were really crumbly and I couldn't even poke it with a fork. Well, it just happened that I had white chocolate bar and leftover heavy cream. So, it was possible to make a cake pop out of it. Remember my "failed" cake pop? Using the same recipe, but with white chocolate instead of dark chocolate, I could make about 20 cake pop out of my leftover cake crumbs.


Make an oval shaped cake pop and put it into fridge to make it nice and firm.  After all the cake pop are nice and firm, first dip half part of it into blue melted chocolate. Before the blue chocolate became dry, insert cake pop stick into the cake pop and put 2 mini chocolate M&M's or choco chips for the minion shoes. Once the blue part is dry, dip the other half into melted yellow chocolate and stick the eye and the hair of the minion. I was using chocolate sprinkle for its hair and edible eye for its eyes. But maybe I should use another kind of white candy because my daughter said that the eye did not taste good. Well, next time better.

Tip : If your melted chocolate is too thick, add some vegetable shortening (I'm using Crisco), pop it into microwave for a few sec, stir it well until all the shortening are melted and mixed with the chocolate. Put it back into microwave and reheat it again if needed or if there is still lump on the chocolate mixture. 


It was only needed a few minutes to make all the chocolate dry. After that,  I start to make all the detail. I put leftover yellow and blue chocolate into zip lock bag, melted some pure chocolate candy and put it into another zip lock bag as well. I used it to draw all the detail such as minion's hands, goggle straps, and their pullover. It was not easy as I imagined. I could not make it as smooth as I wanted. Besides, I had some problems with chocolate and Crisco lump that clogged the tip of my pipping bag. But hey!! The result is not that bad. I even think that they are quite cute. Don't you think so?  ^^


Monday, November 24, 2014

Homemade Cheesy Almond Crispy

It has been months after my last post. I've been busy since my last summer holiday (or lazy. Only God knows the truth ^^). I had a great summer holiday in Indonesia. It was amazing. I met all my family, my parents, my lovely sister, and all those people who I've never seen for years during my stay in Netherlands. The weather was amazing (including the heavy tropical rain,  but I still hate the mosquitoes and the flood), the foods were amazing too. I really miss the original taste of Indonesian food.

Speaking about food, when I was in Bandung, my sister in law got a box of snack named Almond crispy cheese. I think it's a new brand of snack because I never found it years ago. After one bite, I have to say that those thing is good. It was delicious and I would love to have another box. But too bad this snack was not available in Bandung because her friend bought from another city.

After the holiday end and I back to the Netherlands, I tried to find the recipe. I was not hoping I would find it but it turned out there are some people who already made and share the basic recipe. And  it is surprisingly easy to made.


From one recipe I could bake two times full of my baking sheets, but only half of them survived and could get inside my container. My daughter loved it. She ate most of the crackers by herself even before I took them off from the baking sheet.


Ingredients :
  • 75 grams egg white  (Tip : 1 large egg contain about 30 grams egg white. So you will need 2-3 eggs to get 75 grams egg white.)
  • 60 grams white granulated sugar
  • 50 grams cake flour (or All purpose flour)
  • 70 grams almond flakes
  • 70 grams grated cheddar cheese
  • 25 grams butter, melted
  • some grated cheddar cheese for sprinkle

Preparation :
  1. In a bowl, with a wire whisk, beat together egg white and sugar until bubbly. (Tip : For making this almond crispy, you don't need to beat the egg white until soft peak formed. There're no even a peak. Only bubbles)
  2. Add flour and melted butter into the bowl and mix them together with bubbly egg whites.
  3. Add almond flakes and grated cheese into the mixture and mix again.
  4. Scrap the side of the bowl to prevent sticky egg white mixture on it.
  5. Wrap the bowl with plastic wrap and let it rest for about 30 minutes in the refrigerator.
  6. Meanwhile, preheat the oven for 150 C (300 F) and layer a baking sheet with baking paper. 
  7. Take the almond mixture out from the fridge and fold and stir it once more with a spoon or spatula.
  8. Take about 1 tbs of mixture and put it on the prepared baking sheet. Spread it very very thinly and evenly. (Tip :  You can make it round, or rectangle, or unshaped, or anything, but the most important thing is spread it thinly (2-3 mm thin) and as even as possible to make it evenly cooked and crispy.)
  9. Repeat it with all the batter left. 
  10. Sprinkle on top with some of grated cheddar cheese.
  11. Put the baking sheet into preheated oven and bake it for about 10 minutes. Rotate the baking sheet and bake it again for another 5-6 minutes.
  12. Take it out from the oven and let it cool completely before removing all the almond crispy from the baking paper.
  13. Store it in a air tight container. Be careful not to press it too hard. 

Sunday, July 13, 2014

Blueberry Cake

Last week, when I was trying to find cake recipe on the internet, I stumble on a nice picture of a blue cake. That cake was soooo blue and looks awesome. After I read it further, it says that it's a blue velvet cake. I found that the cake was using some blue berry for its ingredients and quite a lot of blue dye. I really want to make it because it looks so blue and pretty. But I don't really want to use that much of blue dye. Well, I've made red velvet cake using raspberry concentrate. And it happened that I have a box of blueberry in my fridge. Maybe I could make a blue velvet cake with blueberry concentrate or something similar. Or maybe I could even throw in some blueberry inside the cake to increase the blueberry taste.


First, I made the blueberry jam. I had to admit that I let too much liquid evaporated but it doesn't matter. Meanwhile waiting for the jam become cool, I started to make the cake batter. After the batter was done, I pour all the jam into the batter and mix it manually. The result was not like I was expected because the batter turned out purple and not blue!! I added few drop of blue dye and hoping that the color would turn like the one on the internet. But after drops of blue dye, I couldn't get royal blue color like the picture. To be honest, I started to regret my decision to add some blue dye. Why didn't I add purple dye instead to make a purple cake instead of blue cake. Well, what's done is done. Can't be undone. I pour my blueish batter into the pan, and put it into the oven. 15 minutes inside the oven, I just realize that I made another mistake!! I totally forgot to add some fresh blueberry into the batter. Oh well...


After the cake was done and completely cool, I cover it with butter cream cheese frosting and decorate it with some fresh blueberry. (Forgive me for a bad and plain decoration. I was not in a mood to decorate a cake) Like as usual, I made a small round blueberry cake and few of mini cupcake. The cake taste good and even better with butter cream cheese frosting on it.


Ingredients :
  • 192 grams (3/4 cup) AP flour
  • 1/2 tsp cacao powder
  • 1/2 tsp Baking Powder
  • 30 grams unsalted butter, room temperature
  • 92 grams white granulated sugar
  • 1 large egg
  • 1/2 tsp vanilla extract
  • 120 ml (about 1/4 cup) milk
  • 1/8 tsp salt
  • Royal blue coloring agent
  • For blueberry jam : 150 grams fresh blueberry + 30 grams white granulated sugar + 50 ml water

Preparation :
First, lets make the blueberry jam
  1. In a pot, boil together blueberry, sugar and water until the blueberry start to break down.
  2. Stir until almost all of the liquid are evaporated.
  3. Transfer it into a bowl and let it cool completely.

Now, lets make the cake. 
  1. Preheat oven for 180 C (350 F)
  2. Prepare a cake pan, grease with butter, and line it with baking paper. Set aside. (Tip :  you can always use a muffin tin instead)
  3. In a bowl, mix together flour, cacao powder, baking powder, and salt.
  4. In another big bowl, with a electric or hand mixer, beat the butter until creamy.
  5. Add granulated sugar into the creamy butter and beat again on high speed until light and fluffy.
  6. Add egg and vanilla extract into the butter mixture and beat again.
  7. Add about 1/3 of flour mixture alternately with about 1/3 of milk. Mix well before adding another 1/3 of flour mixture and milk.
  8. Add blueberry jam into the batter and fold it manually with a spatula. 
  9. At this point, once the blueberry jam is well mixed with the batter, you should get a purple batter.
  10. Add few drop of blue coloring into the batter (if you want to make a blueish cake) and mix well.
  11. Pour the batter into prepared cake pan or muffin tin.
  12. Put it into preheated oven and bake for about 30-35 minutes or until skewer inserted into the cake comes out clean.
  13. Take it out from the oven and let it cool completely before cutting or adding buttercream on it.

Thursday, June 26, 2014

Choco Almond Cookies

Choco chip cookies is one of the most famous cookies that ever existed. Who doesn't like this delicious cookies. It is crunchy outside and chewy inside with half melted chocolate chips on all around the cookies. I like it. It's perfect to be served with hot tea, coffee, or even ice cream. This chocolate chips cookies is originated from United States which was traditionally made from a dough contained butter, brown sugar, white sugar, and chocolate chips. Nowadays, this choco chip cookies have been improved and modified a lot. There are a lot of variants besides chocolate chips such as choco-macademia, choco-dried cranberry, white chocolate chips, or even M&M's. 


Few weeks ago, using a basic chocolate chip cookies that I have, I wanted to combine it with sliced almond. I still had some sliced almond left on my kitchen. I think it's a good combination.  For my cookies, i would not use any chocolate chips but I will use chopped chocolate easter eggs instead. I still have plenty of easter chocolate and no one eat it anymore. So, why don't make them useful.


It's very easy to make. Even my son  helped me to sprinkle some almond on the top of the cake. (Some of it disappeared on his mouth) When i put the dough into the oven my house smelled like a bakery. It smells so good. And when it's done, my kids could not wait to dig it in. They kept peeking into the oven to watch the dough slowly melted and spreading because of the heat during the baking process. Definitely would make this cookie again next time.

Ingredients :
  • 225 grams All purpose flour
  • 150 grams room temperature unsalted butter
  • 70 grams brown sugar
  • 60 grams white granulated sugar
  • 1 large egg
  • 2 tsp vanilla extract
  • 1/2 tsp baking powder
  • 1/4 tsp salt
  • 120 grams chopped dark chocolate or chocolate chips
  • 120 grams sliced almond
  • 30 grams sliced almond for additional sprinkles (optional)
(Tip :  Feel free to increase the amount of chocolate chip up to 200 grams if you want to have cookies with a lot of chocolate on it. )

Preparation :
  1. Preheat oven for 190 C (374 F)
  2. Prepare a baking sheet and line it with baking paper. Set aside.
  3. In a big bowl, mix together butter, brown sugar, and white sugar.
  4. Beat them together until creamy.
  5. Add egg and vanilla extract and beat them again.
  6. Add flour, baking powder, and salt into the mixture and beat them together.
  7. Add chocolate chip and sliced almond into the dough, and mix fold them with a spatula until all the chocolate and almond are evenly distributed.
  8. Take about 1- 1 1/2 tsp of dough, with 2 spoon form it into a ball, and drop it on the prepared baking sheet. Leave enough space between each dough ball to allow the cookies spreading during the baking.
  9. Sprinkle some more sliced almond on the top of the dough. 
  10. Put the dough into the preheated oven and bake them for about 15 minutes or until the cookies become golden brown (Tip : increase the baking time about 3-5 minutes of you want to get more crispy and crunchy cookies).
  11. Take the baking sheet out of the oven and transfer the cookies into the cooling rack.
  12. Let them cool completely.

Monday, June 16, 2014

Tuna Pancake Roll

I made this Tuna-Pancake Roll few weeks ago (it was last month I think). I never made this kind of dish before and I was surprised that it was more than edible. It was good!! I usually eat pancake for breakfast with some sugar or honey or with some bacon or sliced fruits. Any kind of topping I want. But I never tried to fill it with something and roll it like this.


It is a pancake filled with tuna and mixed vegetables, roll it, and bake it in the oven. It's easy, simple, and kind of unique for me. Even better, people who doesn't have electric oven can make this one as well as long as they have oven toaster.


Actually, the story begin on few weeks ago, when i was doing some shopping with my kids on a local grocery store, my daughter saw a flyer recipe suggestion over there. She took it and asked me if i could make it for her. She assumed that it must be delicious because she read "kids favoriet" on the bottom of the recipe. Well, most of the recipe with those note are usually acceptable and friendly for children.


It has a short recipe on the back of this flyer.


I read the recipe, and it seems easy and affordable. It's good idea for a dinner and beside, i still had some canned tuna at home and some vegetables. I just needed to buy some ready to eat pancake and some other small ingredients. (oh yeah!! Those time I was too lazy to make the pancake by myself.) So, let's get started :)

Ingredients :
  • 2 can of canned tuna in olive oil
  • 6 whole wheat pancake (Tip : It's a dutch pancake or we call it pannenkoek, not an American pancake)
  • 150 grams broccoli, chopped into small pieces
  • 100 grams carrots, chopped into small cubes
  • white part of 1 leek, thinly sliced
  • 3 green onions, thinly sliced
  • 150 grams creme fraiche
  • 100 grams grated cheese
  • some coriander leaves
  • salt and pepper

Preparation :

  1. Preheat the oven for 180 C (356 F)
  2. Take and heat about 3 tbs of oil from canned tuna in a pan.
  3. Put all the chopped broccoli and carrot and saute them for about 1 minute or until the vegetables start to become tender.
  4. Add sliced leeks and green onion into the pan and stir them again.
  5. Drain the tuna from its oil.
  6. Add the tuna into the pan and stir it until the tuna is mixed well with the vegetable.
  7. Turn off the heat and let it cooled a little bit.
  8. Prepare the pancake in a plate or another flat surface.
  9. Take about 3-4 tbs tuna mix and put it on the top of pancake. 
  10. Roll the pancake and wrap the tuna.
  11. Put it on the baking dish with the seam side down. (Tip:  If you do not have a big enough baking dish you can make by yourself a disposable baking dish using aluminium foil and put it on the baking tray)
  12. Repeat the process with another pancake and tuna mix.
  13. Take about 1 tbs creme fraiche, put on the top of the rolled pancake and spread it just until to cover the pancake.
  14. Add some grated cheese on the top of it and sprinkle some chopped coriander leaves.
  15. Put it into the oven (near the top part of the oven) and bake it for about 5-10 minutes or until the cheese is melted.
  16. Remove it from the oven and garnish with freshly chopped coriander and chili pepper.
  17. Serve it hot with roasted or fried potato and some chili sauce if you like.


Saturday, June 7, 2014

Creamy Tuna Pasta

Yeah. It's good to be back!!

I've been very busy lately which has made me barely had a time to write something in here. My daughter's ballet recital, first communion, etc. Not mentioning all the preparation for all those events. Well, now they're all over and I think it's time to sit and write something in here.

This time, I would like to share one of my favorite pasta recipe. Creamy Tuna Pasta. My husband is tuna lover and my daughter is a pasta lover. If my daughter wants to have pasta for dinner, I mostly make spaghetti bolognese. It's easy and simple to make. Basically, I only need ground beef, onion, and bolognese sauce from a jar. It taste delicious at the first time (I was not really good at cooking back than). But after many times, I get bored with it and want to try something else.


Inspired by one of Pizza Hut's menu in Indonesia, fusilli tuna pedas (fusilli with spicy tuna). By combining my husband and my daughter's favorite food,  I tried to create a similar menu, pasta with tuna sauce. After all cutting, and sauteing all the ingredients, it's time to taste the result. Yum!!  It was not disappointing at all. :-)

Ingredients :
  • 250 grams short pasta (I'm using fusilli)
  • 1 can (185 grams) of canned tuna in oil
  • 1 medium shallot (about 3 Indonesian shallots), minced
  • 2 cloves garlic, minced
  • 3 tomatoes, cut into small cubes
  • 1/2 red paprika, cut into small pieces
  • 1/2 green paprika, cut into small pieces
  • 60 ml heavy cream
  • 40 ml milk
  • 6 tbs tomato sauce
  • 5 tbs sweet chili sauce
  • 1/8 tsp nutmeg
  • salt and black pepper
  • 3/4 tsp tabasco (optional)
  • Some grated cheese
Tip : Feel free to add some vegetables on the sauce. You can add carrot, zucchini, mushroom, broccoli, etc. Just make sure they are sauteed well. 

Preparation :
  1. Fill in a big pot with water (until 2/3 of the way) and bring it to boil.
  2. Once it's boiled, add some salt and the paste into the water.
  3. Boil the pasta and pay attention to the cooking direction on the package to make sure the pasta is cooked well.
  4. Meanwhile, in a big pan, preheat about 6 tbs oil from canned tuna and discard the rest of the oil from the can.
  5. Saute minced shallot and garlic until they become aromatic.
  6. Add paprika and tomatoes cubes and stir until they become soft and the tomatoes start to release all the juice.
  7. Add tomato sauce, sweet chili sauce, heavy cream, milk, nutmeg, and tabasco (optional), and stir again.
  8. Add tuna into the sauce and mix it well.
  9. Add salt and ground black pepper into the sauce, stir, and reduce the heat.
  10. At this point, the pasta should be done and cooked well.
  11. Drain the pasta and add them into the sauce.
  12. Mix the pasta and the sauce together.
  13. Turn off the heat.
  14. Serve the pasta on a plate and add some grated cheese on top.


Tuesday, April 29, 2014

Mini Custard Cream Horns

Did you ever miss or want to eat something that maybe you did not really like before? That what happened to me last week. I suddenly got an urge to eat custard cream horn. I know it was not my favorite snack. I still remember when I was a little girl, my mother used to buy some of Indonesian traditional snack from a local market. She usually bought more than one kind of snacks so I and my sister could choose which one that we want to eat. I never pick custard cream horn. I mostly pick a savory snack instead this sweet custard cream snack. No special reason. Actually a custard cream horn is a delicious snack. It is a horn shaped puff pastry  filled in with vanilla custard cream. For those who has sweet tooth (like my husband), this can be a good snack. It is sweet and crispy outside but soft and creamy inside.


Well, because of my sudden urge to eat this sweet horns, I decided to make it by myself. I already have ready to use puff pastry on my freezer and the horn mold that I ordered from Indonesia last year. But there's a big BUT. I'm going to make my custard cream horn in small size.  My custard horn will have only about half of the size of normal custard cream horn. Personally, I prefer this mini size horns because it is easier to eat (especially for my baby son), more crispy, and..... hmm... I don't know. I just like it. ^^


First, I need to make the horns.

Tip : You can make the horns one day before making the filling. Just let it cool completely, and keep it in a airtight container to keep it crispy and crunchy.

Ingredients : ( for making about 65 mini horns)

  • 5 layer ready to use puff pastry (I'm using 20x20 cm ready to use puff pastry)
  • 1 egg, beaten
  • about 100 gram white granulated sugar
  • 20 grams butter

Preparation :

  1. Preheat oven for 200 C (392 F)
  2. Prepare a baking sheet and line it up with baking paper. Set aside.
  3. Prepare horn molds and grease it with butter generously. Set aside.
  4. Cut the puff pastry into small stripes. (About 1.5 cm wide for each stripe) 
  5. Take one of greased horn mold and wrap the pastry around the mold. Make sure to overlap the pastry a little bit for each round and press it gently at the end of the strips. 
  6. Repeat the process until all the mold are used.
  7. Place the wrapped horn on the baking sheet.
  8. Brush the surface of the pastry with beaten egg.
  9. Sprinkle or roll carefully some granulated sugar on the top of the horns.
  10. Put the baking sheet into the oven and bake it for about 13-15 minutes or until the pastry become golden brown.
  11. Take it out from oven and let it cool completely before starting the filling process. 

Tip : If you can not make the horn in one batch and have to reuse the mold after the previous batch, do not forget to grease the mold with butter again before wrap it with another pastry strip.

Now, let's make the filling. 

Ingredients :
  • 250 ml milk
  • 2 egg yolks
  • 20 grams granulated sugar
  • 25 grams corn starch
  • 1 1/2 tsp vanilla extract
Preparation :
  1. In a pot, mix together about 150 ml milk with granulated sugar.
  2. Turn on the heat, stir, and simmer on low heat until the sugar are dissolved.
  3. Meanwhile, in a bowl, whisk together the rest of the milk with egg yolk, corn starch, and vanilla extract.
  4. Whisk until there's no more cornstarch lump.
  5. Pour the cornstarch mixture into the pot.
  6. Stir and cook the mixture with medium heat until the custard is thickened. (Tip : Be careful not to burn the custard).
  7. Turn off the heat and transfer the custard into a shallow bowl.
  8. Cover it with plastic wrap and let it cool completely.
  9. Once the custard is not hot anymore, open the plastic wrap, and stir once more.
  10. Pour the custard into a pipping bag and cut the tip.
  11. Fill the horn by pipping the custard into the horn.

Sunday, April 20, 2014

Edible Easter Basket

Happy Easter everyone!! May this Easter spirit gives you all a new hope, faith, spirit, love, and joy. To celebrate Easter this year I've made this cute edible Easter basket because I was getting a little bit bored with painted and decorated boiled egg as usual. So, I made this as a treat for my daughter, son, and some of my daughter's friends.


Actually, the first plan was to make a mini paper basket like the one that I've made for my daughter's birthday treats years ago. I would fill those basket with small chocolate easter candies and chocolates. But like as usual, during the process, I found a nice video tutorial how to make an edible easter basket. It's easier to do (than rolling a lot of papers and weave it into a small basket) and i have almost all of the ingredients available in my kitchen. Beside, I think this could be a good experiment to learn how to deal with chocolate because it's a little bit tricky for me. I still need to learn how to melt and tempering chocolate properly so it wont be melted on the room temperature.

And, this is what I need to do. First, I need to make the strap for the basket.  I was using strawberry candy stripes for the strap (Those are the only candy that I had). The candy was too thin so I made a braid out of it.


This braided candy strips is stronger than single candy strip. But still too weak and can not stand properly. So, I decided to cover it with melted chocolate and put it on refrigerator for about 10 minutes to harden the chocolate.


Now,it's time to make the basket. I just pour about 2 tsp melted chocolate into a muffin paper cup and with a toothpick make the outer of the chocolate basket. .


Now, assemble the strap with the basket and put in in a refrigerator for about 10-15 minutes.  After the chocolate is hardened, carefully peel the paper cup from the chocolate and fill it in with some cute easter chocolate candy. It's cute, isn't it?


Thursday, April 10, 2014

Chicken Teriyaki Rice Burger

Teriyaki sauce is one of my favorite sauce. Actually, teriyaki itself is  a cooking technique in Japanese cuisine. The word teriyaki is a combination from 2 Japanese words : tare (means luster) and yaki (means grilled or broilled) (Wikipedia.org). So, basically, the meat will be brushed or dipped with the sauce before grilling or broiling process. Teriyaki sauce is traditionally made by mixing and boiling soy sauce, sugar, sake, and mirin until they are thickened. It taste delicious and very famous all around the world.

This time, I want to make teriyaki burger. To be honest, i was inspired by runnyrunny999's rice burger recipe. He's using rice instead of bread for this kind of burger. It seems that this burger is quite popular in Japan. I still have some Japanese rice. So, why not try to make this rice burger. I bet they are delicious.


During the process, I found out that this burger is easy to make but quite time consuming because I had to really to pay attention on in to prevent it from burning. Beside, I still had to make the rice burger as well after making the chicken patty. And it was difficult to make the rice burger. I had to try few times before I could make it into a nice firm flat round shape like a burger. When I finally made it, the shape was still not perfectly round and some of rice will crumble all around. But it was worth it. All my hard work was paid off. The burger was so yummy. I love it.

Tip : The burger also can be served with crusty bread such as kaiser roll or Italian bread (ciabatta) instead of rice burger.

First, lets make the chicken patty.
Ingredients : (serving 4-5 burgers)
  • 250 grams boneless skinless chicken, ground or minced well
  • 1/2 medium onion, minced
  • 1 tsp soy sauce
  • 3 tbs breadcrumbs
  • 4 tbs flour
  • 1/4 tsp ginger powder (or 2 cm fresh ginger, grated)
  • 1 clove of garlic, minced 
  • 1 medium egg
  • 1 tbs sesame oil
  • salt and ground black pepper
  • 6 tbs water
  • 3 tbs soy sauce
  • 2 tbs mirin
  • 2 tbs white sugar
  • 4-5 tbs vegetable oil
Preparation :
  1. In a bowl, mix together ground/minced chicken, minced onion, soy sauce, breadcrumbs, flour, ginger powder, minced garlic, egg, sesame oil, salt and pepper.
  2. In another small bowl, prepare the sauce by mixing together water, soy sauce, mirin, and sugar until most of the sugar are dissolved.
  3. Preheat a non stick pan
  4. Add some oil into the pan
  5. Divide the chicken mixture into 4-5 part. 
  6. Make a ball from each part of it. Press down the ball to make a flat burger. 
  7. Put the burger into preheated pan and fry it for about 3 minutes for each side or until it become golden brown.
  8. Pour the sauce mixture on the top of the chicken burger, reduce the heat, and cover the pan.
  9. Let it cook for about 1-2 minute until the sauce is thickened.
  10. Turn off the heat and remove the burger and the sauce from the pan. 
Now, lets make the rice burger.
Ingredients :

  • About 3 cups room temperature cooked Japanese rice.
  • 2 spring onions, finely chopped.
  • salt
  • sesame oil
  • soy sauce
Preparation :
  1. In a bowl, mix together rice, chopped spring onions, and salt
  2. Wet your hand, take some rice mixture and make a firm ball out of it.
  3. With both hand palms, press it gently until it become flat (about 2 cm thickness)
  4. Repeat the process until you have 8 rice burger
  5. Preheat about 2 tbs sesame oil in a pan.
  6. Place the rice burger gently in those preheated pan.
  7. Fry until golden brown on both sides. (Tip : do not flip the rice burger too much otherwise it will be broken)
  8. Brush some sesame oil and soy sauce on both side for taste.
  9. Remove the burger from the pan and assembly it with the chicken burger. 
  10. Serve it hot with fresh salad.


Monday, March 31, 2014

Honey Whole Wheat Banana Bread

Have some leftover overripe banana? And getting bored to use it for banana milkshake or fried bananas? Don't throw it away. Making banana bread is one of a great and easy idea to use leftover  overripe banana. ^^ I've been searching for a banana bread recipe and tried some of them but none of them really touch my tongue and my heart. Last week, I found this recipe from cookieandkate.com and tried it with a little bit modification. It was great!! This recipe didn't use any sugar on it and use a whole wheat flour instead of white flour. The taste of honey and nutty flavor from the whole wheat flour really gave difference on the banana bread it self. I like it.


When I made it, I tried to sprinkle some mixture of brown sugar and ground cinnamon on the top of the butter right before I put it into the oven. And I liked the result. The melted brown sugar made the top of the bread become crispy and sweet and it goes really well with the taste of the banana bread itself. Totally love it and definitely going to remake this recipe again next time.

Ingredients :
  • 80 ml (1/3 cup) vegetable oil
  • 120 ml (1/2 cup) honey 
  • 178 grams (1 1/2 cup) whole wheat flour
  • 32 grams (1/4 cup) All purpose flour
  • 2 large eggs 
  • 2-3 ( about 225 grams) bananas, mashed
  • 1 tsp vanilla extract
  • 1/2 tsp salt
  • 1/2 tsp ground cinnamon
  • 1 tsp baking powder
  • 60 ml (1/4 cup) milk
  • 60 grams brown sugar + 1 tsp ground cinnamon (optional)
Preparation :

  1. Preheat oven for 170 C.
  2. Grease a loaf pan ( I was using 21x7x8 cm loaf pan) with butter. Set aside.
  3. In a bowl, mix together whole wheat flour, all purpose flour, baking powder, salt, and ground cinnamon. Set aside.
  4. In a big bowl, whisk together honey and oil.
  5. Add eggs, mashed banana, vanilla extract, and milk into the mixture and beat them all together until well combined.
  6. Add all the dry ingredients mixture into wet mixture and stir them together just until they are combined.
  7. Pour the batter into greased loaf pan.
  8. Sprinkle some mixture of brown sugar and ground cinnamon on the top of the batter (optional)
  9. Put the pan into the oven and bake it for 60 minutes (or until tooth pick test comes out clean).
  10. Take it out from the oven and let it cool for about 20-30 minutes before slicing.


Sunday, March 23, 2014

Mickey Mouse Birthday Cake

Hip hip hoera!!! my little baby son is turning 2 now. He's growing up soooo fast. He's getting bigger and smarter. It feels just like yesterday I gave birth to him and hold his tiny little body in my arm and now he's able to run, jump, recognize a lot of words. It has been 2 years already having him by my side. That's why, this time I really want to make him nice birthday cake for him. He likes watching mickey mouse on TV. So, I decided to make a mickey mouse birthday cake for him.


My first idea was a birthday cake shaped like mickey mouse clubhouse with a lot of Disney figurines surrounding the clubhouse. But it turns out if I was going to make that cake,  I would need a lot of cake and a lot of carving unless I have half round baking pan. Besides, no one sell Disney figurines nearby. I had to buy it from Ebay. I had no time to wait for the delivery when I only had 2 weeks before his birthday. Well, looked like that I had to scratch that idea and find another idea for his cake.

Google google google....

And I came up with this idea.


Mickey mouse standing on the top of the cake with some stars as his background. (sorry for this bad pictures. ^^) I would be using vanilla cake and red buttercream to cover the cake and some green buttercream to make some green grass around the mickey mouse. I think fondant is a good material for making the mickey mouse figurine and the stars. I usually change my mind in the middle of the way, but at least now my plan and design is ready. So, lets get started.

1 week before the big day, I made a mickey mouse fondant figurine. I bought white and black fondant. 2 days before making the figurine, i colored some of white fondant into red, yellow, and skin color. I've read and learned how to make mickey mouse fondant figurine from internet and I was really glad I'm living on this internet era. A lot of people shared how to make mickey mouse figurine step by step including the pictures. They are so awesome. Too bad I couldn't make the body. My mickey mouse was a little bit too chubby. The body was too heavy and I made his leg too skinny. They couldn't support the body and my mickey fell down each time I tried to make him stand even when the fondant was already dry. That's why I decided to cut his legs (ouch) and modified it into a sitting mickey mouse version. It was much more easier.

Mickey mouse fondant figurine

I think my mickey is good enough even tough my sister said that it seems my mickey just had a plastic surgery on his nose. Well... hmm... yeah... maybe it's too big. But I like it anyway and I consider it good for a first timer fondant figurine maker. And the most important thing is my son recognize it as a mickey mouse. Not as an alien or any unshaped strange creature. ^^

I made the stars from the fondant as well and using bamboo skewers for the stick. I tried to use cake pop stick but the stick was too big for the small stars. I made it manually using a knife because I do not have 5 pointy star cookie cutter. I let it dry overnight and brush it with golden glitter dust as a finishing touch.

Do you remember my cute mickey mouse cookie cutter? I was using it to make mickey mouse sugar cookies before. Now I'm using it again to make some 2D mickey mouse fondant figure. I just roll out my fondant, and cut it into mickey mouse shape using my cookie cutter. I will use this to write my son's name and maybe i will stick it in front of the cake.

2 Days before the due date. It's time to bake the cake. I'm using Ann Reardon's vanilla cake. It is delicious and moist. Trust me. From one of her  recipe, I could not only can bake 1 full round (20 cm/ 8 inch) cake, but I still have a lot of batter for 15 cm round cake, and about 20 mini cup cakes. That was quite a lot of cake. Well, after all those cakes were done, I wrapped them with a plastic wrap and put them in a plastic container to keep it soft and moist.

Based on my idea, i supposed to make a bright red buttercream to cover the cake. So, one day before his birthday, i made a white basic butter cream. My plan is to color it with red coloring agent until I get a red butter cream. And then, here comes the problem. A big problem. It was very difficult to make a red butter cream. I can not get red buttercream but I got pink one instead!! Pink mickey mouse cake for my son? Absolutely not. I have few type of red coloring agent I tried to use all of them, and none of them could give me a nice red color. I tried to add few drops of orange, green, and blue coloring agent to make the color become darker. Yes it was darker but still not becoming dark deep red like I want. It was really frustrating because I do not want to add too much coloring agent. It safe and foodgrade, but still a chemical agent with maximum usage. Beside, too much coloring agent will ruin the taste of the buttercream.

Thanks God, on those desperate time, I remember that I still have red modeling chocolate that I got few months ago as a birthday present from my friend. I've been wanting to try it  and compare the taste with fondant. I heard that modeling chocolate's taste is much better than fondant.


Well, rolling a huge amount of modeling chocolate was not as easy as rolling fondant. It was not as elastic as fondant. I had to knead it for a long time as well because it was so hard and firm before i roll it out. But yeah!! I did it! Now my cake is covered with red modeling chocolate. I got the color that I really want.

Now, it's time to assemble my cake. The final form is a little bit different than my design. Because of the excessive amount of cake, I put a small tier on the top of the lower cake. I covered it with green butter cream, cover the outer side with yellow fondant, and made small orange dots around the cake. I sprinkled some mini M&M's and colored sprinkles, put the mickey mouse figurine on the top of it and stick the stars on behind.


Because now I covered my cake with modeling chocolate, I thought that writing my son's name on the cake would be a little bit difficult if i were going to use fondant. So, I decided to put some mini cup cakes around the main cake, add some buttercream on the top, and stick the fondant on the top of it.


Voila!!! Done!! What do you think about my cake? is it cute?


After blowing the candle, I let my son play with the cake and he (together with his sister) "redecorate" the cake. Which one is better? His or mine? ^^

Tuesday, March 11, 2014

Kremesan (Crispy Spiced Flakes)

Still remember my last recipe? Javanese Fried Chicken or Ayam goreng Jawa. Like I told you before, I still have another recipe related with those delicious fried chicken. I'm going to make kremesan or crispy spiced flakes. It is a special condiment that is usually served together with Javanese Fried Chicken. It is very popular back in my hometown and makes the dish even more delicious. It is called kremesan because it is can be crushed very easily just only with bare hand (Kremes means to be crushed with bare hand).


I've learned how to make this condiments many many times using many different kind of recipe and I never succeed. Always failed. It always ended up as an oily fried batter. One time, I got this recipe from my friend's mother including all the tricks that I have to do to make kremesan. I tried it, and the result was awesome. I did it!! It was delicious, crispy and exactly like I wanted. It was not as hard as I thought but it was indeed a little bit tricky. That's why there will be a lot of tip on this recipe. I was using the leftover spiced liquid from making the fried chicken.  Do you want to try it as well?

Ingredients :
  • Leftover spiced liquid mixture from making Javanese Fried chicken
  • Some water
  • 1 egg yolk
  • 65 grams maizena
  • Salt, pepper, and garlic powder
  • Vegetable oil for deep frying
Warning! There will be a lot of oil splatter around the frying pan during the process. Cover the floor, wall, table around the pan with old newspaper if needed to make the cleaning process easier. 

Preparation :
  1. With a measuring glass, measure the volume of your spiced liquid. You should have about 400 ml of liquid.
  2. Add more water into the spiced liquid until you have 600 ml of liquid mixture. Adjust the taste with salt, pepper, and garlic powder if needed.
  3. Pour the mixture into a big bowl.
  4. Add egg yolk and maizena into the mixture. Mix well until all are combined.
  5. In a big deep frying pan, preheat vegetable oil to deep fry the batter. (Tip : the oil has to be very hot to fry the batter. If the oil is not hot enough, the liquid from the batter wont be able to evaporate fast in order to make a hollow texture and the batter will be sticky and sink down into the bottom of the frying pan. This hollow texture is the key to success making this crispy condiment)
  6. Meanwhile, prepare a big plate with few layer kitchen towel on the top of it. Set aside. 
  7. Once the oil is hot (try to drop few drop of batter. If there're a lot of bubbles appears from the batter and the batter does not sink, than the oil is hot enough), stir the batter few times and pour one ladle of batter into the pan. (Tip : Pour the batter from about 10-20 cm height from the surface of the oil to help the batter splash and spread faster and cooked at the same time. Do not pour the batter too slow otherwise it wont be cooked evenly at the same time. Tip : do not pour too much batter as well to make sure all the batter are rise up into the surface of the hot oil evenly. Tip : If your batter is not spread up right away on the surface of the oil but sink down to the bottom of the pan and become very sticky, that means, you were failed. Maybe because of the oil is not hot enough.  Do not give up. Remove it from the pan, wait for another minutes and pour another ladle.)
  8. Right after the batter is poured, you should be able to see a lot of bubbles on the surface of the oil coming out from the batter.
    Few seconds after that, the bubbles will start to disappear and the color of the batter start to become golden brown. 
  9. Once the color become golden brown, with wooden spatula, carefully spoon and fold (do not stir) the fried batter from the edge of the pan into the center of the pan.

  10. Fry it for another few seconds until most of the bubbles are disappear 
  11. With a strainer, remove it from the pan, drain well, and put it on the prepared plate.
  12. Let it cool and harden.
  13. Repeat the process with the rest of the batter.
  14. Serve it with Javanese fried chicken, hot steam rice, and sambal.
  15. Store the rest of the kremesan in an air tight container lined with kitchen towel.
Good luck ^^


Wednesday, March 5, 2014

Ayam Goreng Jawa (Javanese Fried Chicken)

My another favorite dish!! Javanese Fried Chicken or my family usually call it Ayam goreng Jawa. It is a very popular dish in Indonesia (especially in Java) and very common to be served together with hot steamed rice, sambal, and some raw vegetables (lalap) such as sliced cucumber, tomato, and lettuce. It is very delicious with its sweet and savory taste.


Actually, there are a lot of name for this fried chicken. Some people name it Ayam goreng ungkep (Fried slow cooked chicken) or Ayam goreng bumbu kuning (Fried chicken with yellowish spices). Well, actually those name are not wrong because of how we cook the chicken. The chicken will be cooked in mixed yellowish spices for about 30 minutes - 1 hour before deep frying until golden brown. I really like it. And the best part is I can cook the chicken days before and keep it in my refrigerator for days (even for weeks in freezer). When I want to eat it, I just need to take it out from my refrigerator, let it sit on room temperature for a while, and deep fry the chicken. 

Ingredients :
  • 1 kg chicken, cut into pieces
  • 4 medium shallots (about 10 Indonesian shallots)
  • 5 cloves of garlic
  • 4 candlenuts
  • 4 cm fresh galangal (about 1/2 tsp galangal powder)
  • 2 cm fresh ginger (about 1/4 tsp ginger powder)
  • 1/2 tsp turmeric powder
  • 2 tsp ground coriander
  • 2 tsp salt
  • 1 lemongrass, bruised and knotted
  • 1 bay leave
  • 1 tbs palm sugar
  • 400 ml canned coconut milk (medium thickness)
  • 400-500 ml water
  • a lot of vegetable oil
Preparation :
  1. Ground together shallots, garlic, candlenuts, galangal, ginger, turmeric powder, ground coriander and salt until you get a paste form. 

  2. In a big and deep pan (or a pot), preheat about 5 tbs vegetable oil.
  3. Add spices paste into the pan and saute the paste for about 30 seconds or until fragrant.
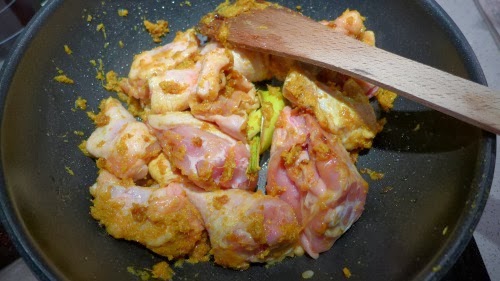
  4. Add the chicken into the pan together with lemongrass and bay leave. Stir them together for a while until most of the chicken are covered with the spices.
  5. Add coconut milk, water, bay leave,  and palm sugar into the pan and stir once again.
  6. Reduce the heat and simmer for about 1 hour until the chicken is well cooked. Stir it once in a while during the process.
  7. Turn off the heat, drain, and remove the chicken from the pan. (Tip: at this step, you can put the chicken in an airtight container and store it in refrigerator to serve it for another time. Tip : Do not throw away the leftover liquid from simmering the chicken. It can be used to make a delicious condiment later)
  8. In another big pan, preheat vegetable oil to deep fry the chicken.
  9. Once the oil is hot, deep fry the chicken until they become golden brown.
  10. Remove the chicken from the oil, drain well, and remove the excess oil using kitchen towel if needed.
  11. Serve the chicken hot with hot steamed rice, sambal, and some raw vegetables.
During the process of cooking the chicken, I got a lot of leftover spiced liquid mixture. From that spiced mixture I could make some crispy spiced flakes (or kremesan. Kremes means to be crushed easily just with bare hand). It is a very perfect and tasty condiments for this fried chicken.  I'm going to share the recipe next time.